Showing posts with label Tips. Show all posts

Thursday, February 7, 2019

Few details for the spruce hedge owners

Spruce hedges (Picea abies) are quite widespread in Estonia, and although they are mainly grown in non-urban areas, they are fortunately also used in settlements.
These hedges are a relatively sensible and low-maintenance solution in our conditions, but there are still some important details to pay attention to for hedge owners.


Common spruce (Picea abies) hedge in Estonia. Photo: Ravel Reiljan
  1. When you start a planting, the plants would be worth buying from a nursery where the seeds were selected from high-quality trees and grown under the same conditions. By collecting plants from forest, we can usually get specimens with quite different growth conditions and it may happen that instead of a uniform hedge we have a hedge where some plants grow faster than others and some plants have a narrower needles than others. In addition, the plant color and dimension may also vary in some places.
     
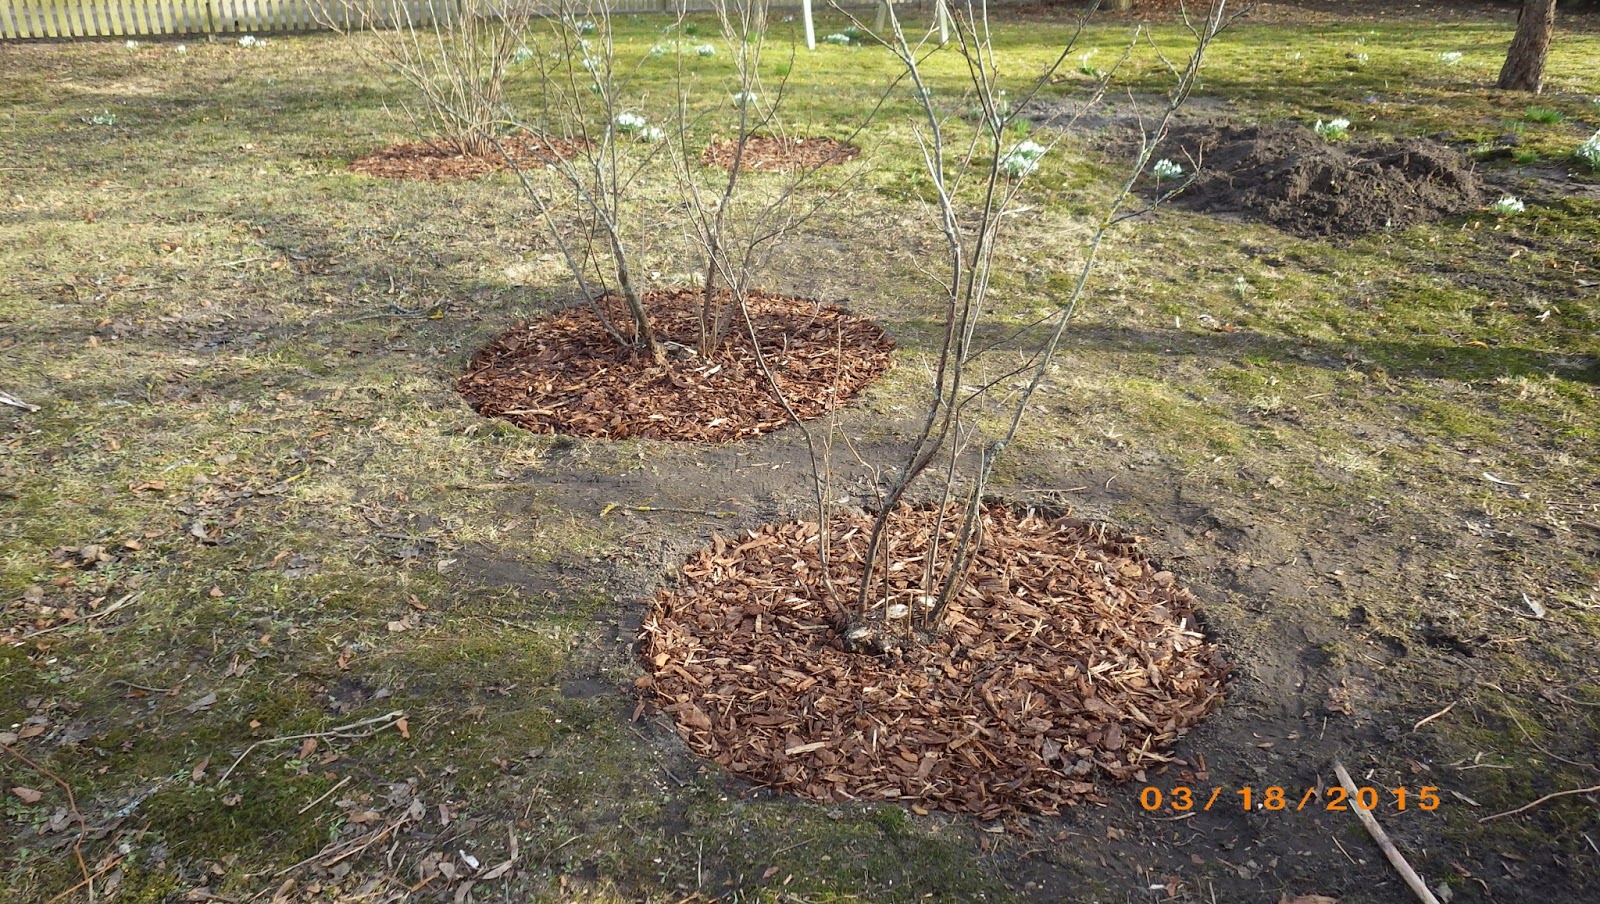
  1. After planting, it should be observed that grass will not grow under the crown of young plants.
    Instead of mowing (there is threat to damage the cambium) or plucking (always risking damage to delicate roots), it would be best to use protector rings or plastic discs with a hole in the middle. Such disks are usually sold in forestry businesses, but can also be produced by yourself. 
    They should be used for at least a couple of years until the plants are tall enough.

  2. Many places where a young spruce hedge grows are often easily accessible to a variety of animals that are threatening plants during the winter time. To avoid this problem, it is perhaps the easiest and most reliable way to use a repellent - such as Cervacol (in Estonia) - in this situation, you should treat plants every late autumn (shoots and tops) for some years.

  3. After a couple of years, however, it is not advisable to let the grass grow under the spruce trees - under the young trees it grows easily and the lower branches may die - so, whenever possible, the crowns area should always be kept clean.
    But mowing must be done very carefully in such places - the main damage that I have noticed to young spruce hedges is related to mowing damage. When approaching trees with a trimmer, you should always make sure that the trimmer's head protector is always towards to tree trunk, in which case there is no risk that the cambium will be damaged.
     
  4. Usually alien species tend to grow in young spruce hedges - they should be picked out in the first or second year if possible - later problems may arise.

  5. Trimming is actually a separate topic because everything depends on the growth stage and the type of hedge you want. 
    But - three basic things to remember: 
    a) In Estonia, it is not reasonable to perform trimming in the winter season.
    b) Topping before the growth you need, is not a reasonable.
    c) When you trimming the hedge from top, the hedge must be cleaned from cutting residues.

  6. Occasionally it happens that the top of some spruces can be damaged or is shorter then side shoots. In such situation, a competitors should be removed or shorten.

  7. There is common problem - where one or more plants have started to dry out in hedge.
    If something like that happens, you should react quickly because it may be a fungus called Heterobasidion parviporum (the rate of spread can be up to 2 meters per year through the infected root system).

    How do you understand if this is Heterobasidion
    When all the plants have been bought in one place and only one or a few of them have started to dry, it can be assumed that the small seedlings have not been infected in the nursery. In this case, you should definitely look at the dried plants for more details - are there any signs of mechanical damage in the root collar area? Or is it easy to see a resin or cracks on the strain?

    If any of these things occur on the plant, there is reason to be worried. In this case, when it is seen that the plant dies - it should be gently pulled out and burn it with the root system, if possible. In the case of a young hedge, it's easy, the older plants case you should consult with specialist, there are some different possibilities.

    In such a place, the new plant should not be planted before a minimum of two years.
Heterobasidion parviporum is acting. Photo: Ravel Reiljan
Heterobasidion parviporum fungal body in stump. Photo: Ravel Reiljan
Source: Urbandendro
http://ravelreiljan.blogspot.com/


Tuesday, January 29, 2019

About dendrological evaluations and maintenance plans in Estonia

Most local governments in Estonia occasionally orders a dendrological assessment, maintenance plan, or expert assessment from a some company for evaluation some parks or other green areas.

Unfortunately, we can say that some of these "evaluations" are almost or absolutely useless for a later field works.  

For example, let's look at the following situation: let's say that a local government has ordered a maintenance plan for some parks - so - a procurement is organized, a winner is selected and a job is commissioned.
Work starts - a professional or a professionals army will be coming and investigating - and finally the completed work will be sent to the local government.
 

The job is serious, its volume is tens of pages for one park - there is a lot of accurate information about the condition of the trees and also the maintenance - we can think, but, unfortunately, browsing the finished work, we have to be surprised to find that most of the dozens of pages are just background information - the history of the park, a lot of beautiful pictures, general talk, all kinds of descriptions and everything else - the only thing that is not there - is the exact description of the health conditions of the trees and the exact description of the work to be done.

Let's take a couple of examples - I have found the following keywords in the sections of health status and maintenance descriptions, for example, when I have flipped through different expert works:
"low tree", "young, beautiful tree", "lesion", "fungal body", "take away some branches", "shell damage", "strain damage", "thickener", "hollow", "strain hole", "dry branches", etc.


What does this information gives to the worker who need to work according to this plan? How company performs the necessary actions based on this information?
And then - the job goes again to the archive, and the company that works on the site has to figure it out and decide how and what to do...


For such work, it could be said that it is a waste of tax money - the local government should not accept such works and pay for it.
There is no need for a specialist to carry out such work, such descriptions may be given by a person who does not particularly know a lot about the evaluation or the mechanics of trees.


In reality, it is not difficult to describe the condition of the tree and the risk factor (to some extent) with simple visible things - you just need to know the way of life of trees and a some of tree mechanics.

For example, there is a widespread perception (in Estonia) that a tree with hollow is dangerous and needs to be cut - this is rarely the case - we can say quite firmly that certain hollow trees are no less dangerous than any healthy tree.
In addition - fungal fruiting bodies in tree trunk - what does this knowledge gives us?

Nothing, if we do not know the type of fungi, the type of rot is caused, and how large is the hollow or decay it has already made.
Also - is a leaning tree dangerous? Many think it is - but there are some rules that can make a leaned tree more stable than an adjacent straight-growing tree.
Etc, etc.


So - what to do and how to improve the situation?
   
First of all, local government officials who decide on the maintenance, also over life and death of trees, but feel at some point uncertainty, should get to know their area better - so they can demand more precise work.
To do this, they can always turn to the local arborist, the Estonian Arboriculture Society or the Arborist Chamber - if necessary, all of these are believed to be ready to organize the relevant training sessions, study days, or just consult if needed.
Don't be afraid to ask - asking never shows stupidity or inexperience - it shows a person's interest and caring - it shows that the official is worried and wants to get the best deal for our environment.
And the questioning officer is one thing which makes the arborist proud.


Secondly, the arboriculture organizations, federations and schools should think - maybe we can be able to create a simple training center for local governments - the environment is, however, our common concern and every specialist should give a share to their social contribution.

Thirdly, companies that estimates parks or green areas, could involve an external specialist (e.g. arborist) to assess the health status of trees and describe maintenance activities. I believe that the situation will improve considerably.

Fourth, an official who prepares a procurement contract could set out specific things that are not recommended for the job (history, background descriptions - if it is already done sooner - and usually it has, several times, etc.) at the start of the procurement and which are desired (health assessment of the trees, precise care instructions, perspectives, problematic places - real solutions).

Source: Urbandendro
http://ravelreiljan.blogspot.com/

Sunday, January 20, 2019

Blackcurrant gall mite is attacking - what to do?

Sometimes in the summertime happens that the blackcurrant shrubs suddenly do not seem as healthy as they should be, also in the harvest time there are less berries as sooner years.
It can be caused by different pests or diseases, but it is most likely the result of black currant gall mite action.
In the Estonian environment, the black currant gall mite is mainly damaging black- and lesser red- or white currant, also very rarely gooseberry shrubs.


How do I know that it is gall mite? 
During the summer period, the damaged shrubs tends to be sickly and partially wretched. At the time of harvesting, the amount of berries is usually much smaller than in the previous harvest years. There are also some branches with old buds from the previous year.
The most convenient and secure is to determine the existence of pests in the spring (in Estonia the first half of March). Then look carefully at your shrubs - if there are two varieties of buds - one type rounded and the other with a sharp tip - the thing is, to put it mildly, dubious.
Buds where mites are in action. Photo: Ravel Reiljan
In this case, take a few round buds, look for a hard base and cut the buds with a thin piece of steel. Then use modern technology - (with naked eye you can't see nothing, because the size of the mites is only about 0,2mm) for example, a magnification glass or a mobile/camera macro.
There is no need to look for those characters very hard, because there may be a whole group, ie mite(s), eggs, larvae etc, in one bud. Moreover, the population of a single bud can be very large, reaching thousands of individuals - so if you have a handy tool with sufficient magnification, you will see them immediately (they have fun in bud and they fuss around).
Inside the bud - eating. Photo: Ravel Reiljan
What to do?
 
What if the diagnosis is confirmed?
Then you have to act - if the shrub is too tight, it has overgrown or drooping branches, then first thin your shrub to a reasonable extent, then start to pin out the round buds. Collect them and burn them immediately (not suitable for composting) with expelled branches - if you don't, the shrubs will soon be destroyed because the source of infection remains.
 
If about half of all buds remain in the shrub, the shrub can usually cope with the situation itself and begin to recover quietly next season (this activity must be repeated every year until the problem is off the agenda).
But if the bush has practically all buds inhabited, the story is more complicated - in this case, the situation should always be based on - how long have the symptoms lasted? Are there few or many shrubs damaged? Is there a risk of major financial damage

In this case, the use of a systemic poison or destruction of shrubs may be considered. You should now consult a professional.
When it is best time for pinning buds or thinning shrubs?
The most convenient time for this is actually the first half of March (in Estonia), because you can then easily make the difference of the good and bad buds, and this time is also well suited for thinning shrubs.
What more to notice?
A very important aspect - always disinfect the cutting tools before going to a new shrub and after cutting the last shrub.
Use antiseptics for this purpose (vodka is not suitable).

Why do they come to my plant?
If we are dealing with a shrub grown from good material that has been properly nursed in a nursery and then properly planted in a growing site/soil and has been properly maintained in the garden (agrotechnics), then this question is really justified.
However, if any link in this sequence is so weak that the plant cannot handle it quickly, it is not good - the stressed plant is susceptible to various malignancies and diseases, and then the serious problems are no longer far away.
So - the presence of mites in your plant is usually (in the case of mites, often the question is bad reproductive material) is a plant emergency call for you as a caregiver - something is wrong with the plant and it needs your urgent help.
How to help?
In this article I wouldn't better deal with it because the subject is more sizable and requires a separate approach - however, some of the risk factors I have noticed are: untreated (too tight, aged) shrubs, autumn leaf and placing apples under the shrub, ash throwing under the shrub and excess soil acidity. If you are attentive to these things, there is already a high probability that your shrubs will be healthier and stronger.

Tuesday, August 14, 2018

About planting a tree - briefly

Sometimes, there are situations in life, when it is necessary to plant a tree. 
In that case - it is important to note some of the aspects which can be helpful for tree - so, briefly:

Freshly planted tree. Photo: Ravel Reiljan

1. Root collar and grafting point
Seedlings have a thickener, called a root collar, located at the point where roots and trunk meets and there are also grafting places in grafted plants.

It is important that both - the root collar and the grafting point (if the grafting point is in the area where roots meet trunk, not in the upper part of trunk..!), should stay slightly out from the soil.
 
The location of the root collar or the grafting point is necessary to be checked when purchasing the plants - in nurseries (in Estonia) I have often seen, that the root collar or grafting point is located even up to 5 cm deep in the soil.


In the case of already planted trees, it would be wise to dig a little bit around the trunk to find a root collar or grafting point - the maximum depth I've encountered has been even over 20cm!

In this case, the plant should, if possible, be raised with a soil, if it is already rooted, it is possible to correct this with a mulching system - see: 

http://urbandendro.blogspot.com/2018/01/how-to-mulch-your-small-trees.html


The crafting point locates about 20cm deep in the soil. Photo: Ravel Reiljan

What happens if you do not leave the crafting point or root collar out of soil?
This is the situation we can compare to a human being, it would probably be something like that, if we were wearing a continuously moist wool around the neck thru the year - the area becomes sweaty, it becomes hot and an inflammatory condition that can affect the whole organism.

The same thing happens with trees - they can become weak or vulnerable to various external influences such as diseases, pests and fungal pathogens. This process can last for several years, depending on the species and conditions.

Typically, in this case, the "cure" or "remove" secondary symptoms is attempted, but the source of the problem is another thing - although it would be possible with a simple technique to improve the plant's condition during one growing season.


2. Not mulching your tree
Newly planted trees are often planted in the city area where mowing the lawn is regular - I have seen lot of young trees with a lot of injuries caused by mowers and trimmers - for a young plant, it can mean long fighting period, developmental deterioration or even death.

Mulching the tree is
one very good way to save trees from mowing or trimming damage.

The result of careless mowing. Photo: Ravel Reiljan

3. Not watering your tree
In common areas, the problem of dying plants is often a major problem (in Estonia) - the first watering is done, but the rest is left without care. 

But in the last 10 years, the climate has changed so much that even in Estonia, you can not leave a plant without a watering for at least two first years.


Watering is sometimes a problem even in nurseries. Photo: Ravel Reiljan

4. Not releasing the planting bag or net around the root collar or crafting point
This is often the case with two extremes - either planter do not touch the cover of the soil at all or will take it completely off.

Neither is sensible.

The best option is to unpack the horizontal part of the coating material or to unplug it, and the vertical portion will break apart over time (if it is biological material).

These are the four most critical situations that can make it fate to plant tree, the rest of the details are also important, but in general, with a proper soil ball plant, there is no problem - we can talk about them in the future.


Source: Urbandendro
http://ravelreiljan.blogspot.com/


Sunday, June 24, 2018

How to make a free-form mulching areas?

In the previous post (http://urbandendro.blogspot.com/2018/01/how-to-mulch-your-small-trees.html) we looked at why and how to make a round mulching areas - in this post we have one simple additional feature - free-form mulching area.
How to do it?

Making a free-form mulching area is actually quite simple - you need only few tools like a knife, some piece of rope or hose, trowel, a garden harrow and a bucket.

Now - using a piece of rope or hose, you can mark the area as you like it to be - as it is shown in the picture below:


Starting the free-form mulching area. Photo: Ravel Reiljan


Then, with the knife, carefully (do not cut yourself) cut the lawn along the rope or hose (not deeper than 10cm). Then you should start to remove the sod (it should be done with care as well, because some plants have their root system pretty close to the ground).


Removing the sod. Photo: Ravel Reiljan

If the sod is removed, remove also excess soil (about until the depth of the 5-8cm).
You can use the sod and soil elsewhere in the garden and also it is suitable for composting.


Soil is removed, mulching area is ready for mulching. Photo: Ravel Reiljan

If the area is prepared, then you have to install mulch (usually I use pine-tree mulch, with a fraction of 15-48mm).  

Do not use hardwood or fresh pine bark (it may cause various problems with degradation processes and the spread of diseases).
If the mulch is in place, it should be tightened lightly and watering - usually one cup will suffice (in the event of slight damage to some part of the root).


The mulching area is ready. Photo: Ravel Reiljan

The most important thing in mulching is that the trunk and mulch can not interact with each other (if your plant have a root collar), the difference between the trunk and the mulch should be at least 5cm and should be checked in the meantime, because children, animals, shearers and weather conditions tend to stick it to the trunk.

Every next year, it's most convenient and easier to add some mulch, if necessary.

Source: Urbandendro
http://ravelreiljan.blogspot.com/

Saturday, January 27, 2018

How to cut tree branches?

First of all, I must say - if possible, do not cut the branches by yourself, better call a specialist for that.
However, there are situations where it is necessary to do that by yourself - but how can it be done so that the result is visually nice and tree's health would not suffer much from it?

Generally, people cut the branches out of random places - but this is not quite good for the tree.

There are several important things to pay attention to - so I will describe them very primitively and briefly:


Typical incorrect cutting. Photo: Ravel Reiljan


1. When to prune?
It depends, first of all, on what species of tree it is and, secondly, on what it wants to achieve by pruning:

a) those species of trees that are at risk of spring juice can not be cut in the spring - the best would be to cut them until the leaves are completely formed (thus, broadly speaking, it would be suitable for pruning from mid-June to late July).

These species are, for example, in Estonia - (Sp.) Betula, Juglans, Acer, Ulmus, Fagus, Populus, Salix, Corylus, Aesculus, Sorbus etc.
Other tree species can be cut at the same time (or in the summer), or in the early spring, before the buds sprout and burst.

b) if it is desired to cut completely dead or broken (dangerous) branches from the tree, this can of course be done throughout the year.
If, however, the living and healthy branches - then to be guided by point a.


2. What should be done before you begin to cut?
a) make sure that you really need to cut the branch or branches.
b) have sharp tools - see sub-topic 3.
c) before cutting, the blades of the cutting tools must be cleaned with antiseptic or spirits (not vodka) (this procedure needs to be repeated for each different tree).
d) ensure the security of yourself and others.


3. By what to cut?
Two things are usually appropriate for cutting - bypass secateurs and hand saw.
Usually, with a scissor, it is convenient to cut a branch to a width of about 2 cm, if there is bigger branch it would be better to use a hand saw.
It's not advisable to use a telescope cutter in your home - it's only good in the case of specialist, who is working with it constantly - yet, if you are not able to access the securely cut branch, use a telescopic cutter - it is then better for your safety.
When you come near the tree with a chainsaw, there is something wrong - in this case, turn to the specialist and ask what to do (in the case of broken branches it is, of course, understandable).


4. How to cut?
The most important:
a) do not leave tree snags - it means - do not cut from any place. 

b) do not injure or cut off the branch collar, cut branch exactly from the above the branch collar - see the picture below.
c) the bigger branch should be cut in three steps
so that the branch does not tear - see the picture below.
 
These are the main things.
These suggestions should not be transferred to the care of the
Betula pendula var. carelica - there are different technologies that we do not currently discuss here.


Photo: Internet, Shigo technique.
Cut line by digits, end point from point A to B. Photo: Internet.


5. How much to cut?
The less, the better.
You can always take it away, but you can not put it back..


6. How big cuttings?
Up to 5 cm in diameter - a good solution.
5-7cm diameter - tolerable.
7-10cm diameter - not good for the tree - it is worth looking for alternatives if possible.

A diameter of more than 10 cm - it is worth call to the specialist - perhaps another solution is possible (for example,
weakening of the branch, cabling, etc.).


7. Should you cover the cuttings?
Briefly, no.
Your plant can generally cope with its own wounds.


8. How fast are the right cutting areas to grow (encapsulate)?
Very broadly speaking, about 0.5-1cm per year (in Estonia, varies by species).
It is worthwhile to remember that contrary to popular belief, the cuts made to the tree does not heal, but will be locked into the tree by the defenses systems of the tree itself.


Of course, the "cutting" activity is just as specific as other arboristic things - there are different types of cutting possibilities, as well as different cutting techniques and alternatives for cutting, but - while following the simple points above, there is hope that the trees will be less damaged by cutting.

Enter, for example, "Shigo pruning" in the Internet search engine, select the images, and you will see a lot of pictures to guide you.


Source: Urbandendro
http://ravelreiljan.blogspot.com/

Thursday, January 11, 2018

How to mulch your small trees?

Mulching is beneficial for the tree - also it's decorative, helps to mow comfortably and reduces mowing damage.
But mulching has one more advantage - when the tree is planted too deep, it helps to bring out the point of graft or root collar.

I have noticed that planting too deep is a common problem - often, the tree is planted deeper than it was in nursery but this is not suitable for many seedlings and grafted plants - this has often been the reason why the plant will remain vegetate for several years or will be there other problems (various diseases, pests).

With mulching we can regulate the grafting point or root collar.

How?

First, you can see a tree whose grafting point is about 5 cm in the soil, in addition, the trees bark is damaged by a trimmer.

Grafting point under the ground. Photo: Ravel Reiljan

In order to make a exact circle, it would be worthwhile to use a string - tie one end around the tree trunk and the other end around the knife handle (the length of the string from the trunk to the knife should be at least 50cm).
Then, with the knife, carefully trim along the circle (not deeper than 10cm).

After that try to take out the grass turf (it should be done with care as well, because in some plants the root system is pretty close to the ground). If the grass turf is removed, excess soil should also be removed (it could be done as deep as possible until the depth is minimum 5-8cm).

Soil can be used elsewhere in the garden, and the grass turf are well suited for composting.

Cleaned area. Photo: Ravel Reiljan

If the mulch area is prepared, then you have to install mulch (usually I use pine-tree mulch, with a fraction of 15-48mm). Do not use hardwood or fresh pine bark (may cause various problems with degradation processes and the spread of diseases).

The most important thing in mulching is that the trunk and mulch can not interact with each other, the difference between the trunk and the mulch should be at least 5cm and should be checked in the meantime, because children, animals, shearers and weather conditions tend to stick it to the trunk.

If the mulch is in place, it should be tightened lightly and watering - usually one cup will suffice (in the event of slight damage to some part of the root).


Mulched area. Photo: Ravel Reiljan


Every next year, it's most convenient and easier to add some mulch, if necessary (sometimes the moths melt their exit precisely in the mulch area).

Source: Urbandendro 
http://ravelreiljan.blogspot.com/

Thursday, October 19, 2017

Evergreen plants needs cleaning


In lot of gardens we can see a different evergreen plants, like (Sp.) Juniperus, Thuja, Chamaecyparis, Taxus, Buxus etc.
As a rule, they need constant monitoring of what is happening inside their crowns.
Almost all evergreen plants placed in gardens needs human intervention.

Why?
What happens if we do not clean their crowns?

Made by: Urbandendro

Sometimes, nothing special happens but sometimes they can begin to bite different fungal organisms, as well as some illnesses that prevent the normal photosynthesis of plants and the circulation of necessary substances.

I have seen that it is quit a common problem, mostly with Buxus, Thuja and different creeping plants.


What to do?
Firstly - you should look inside the plant, inside the crown - if you can see there lot of dead brown parts, then it need to be cleaned.


How?
For this, put on a respirator, goggles and put up strong and thick gloves and start grasping the plant/plants carefully.
Without these protective devices, it would be not advisable to do this work in any way because the dust that arises is truly black and tight.
The cleaning should begin from a top of the plant, by moving slightly to the bottom of the plant, until the inside of the plant is clean from the old mess.


Is it suitable for compost?
Not really, because it does not want to be rapidly decompose and often contain fungal organisms that will not destroy in the compost. If you have a chance to burn it or utilize it differently then it is a better choice.


When it is good to clean?
I would recommend cleaning in the spring, since then the plants will feel better during the summer period and they will grow better also.
Often, cleansing is carried out in late autumn - yes, if there is no other time, it's also very good - however, some of the varieties are a bit cold-tempered, so in some ways the dead parts of plants helps them do it better in cold winter.

Evergreen plants needs cleaning. Photo: Urbandendro


How often to clean?
I would recommend look in to crown once a year and check the situation, but more than once every three years there is no need for cleaning in general.


Should the dead branches inside the crown be cut?

If they are located only inside the crown and some parts of them, then it is recommended, especially with any kind of creeping and ground-like forms - in which case you can keep plant in good condition and the crown will be sufficiently airy.


What to note?
If you clean plants at other times, for example, during birds breeding periods, first try to make sure that there are no nests in your plants.
In the case of creeping plants, you can gently knock with stitch the plant before starting to clean it - if it happens that there is a nest of a animal, then animal can escape and you will not surprise.

Source: Urbandendro (Ravel Reiljan).
http://ravelreiljan.blogspot.com/

Wednesday, April 19, 2017

Marjapõõsaste hooldusest - mida teha, mida mitte?

Tihti on aedades paiknevad marjapõõsad üsna viletsas seisus - ülekasvanud, haiged, heina täis ning kehva saagikusega.

Mida tasuks teha ning mida mitte, et nad oleksid edukad ning me järjepidevalt hea kvaliteediga saaki võiksime tarbida?


Hooldamata marjapõõsas. Foto: Ravel Reiljan

Esmalt - mida teha?

1. Harvendamine:
Kui põõsad on mitmeid aastaid hooldamata, on probleemiks vananenud harud ning tihe põõsas - liigse tiheduse tõttu ei saa uued võrsed edukalt areneda, kuna neile ei jagu piisavalt õhku, valgust ning ruumi.
Hooldamata põõsad on oma tiheduse tõttu ka erinevate seenhaiguste kasvulavaks - peale vihmast ilma on lehtede vahel palju niiskust ning lehed ei kuiva piisavalt kiiresti.
Selletõttu tuleks marjapõõsaid vajadusel harvendada - tavaaia omanikul pole tarvis meelde jätta erinevaid tabeleid harude arvu ning saagikusaastatega - piisab sellest, et hoiate põõsad parajalt  hõredad.
Selleks, et valgus ka põõsaste keskpaika jõuaks, lõigake eakate põõsaste puhul välja üks kuni mitu vanimat/vajunumat/kehvemat haru ning jätke alles vähemalt samas arvus uusi/noori kasve.
Sobiv aeg harvendamiseks on laias laastus detsembrist märtsi lõpuni ning seda tuleks teha vajadusel igal aastal või üle aasta.


Sama marjapõõsas peale esimese aasta harvendamist. Foto: Ravel Reiljan

2. Multśimine:
Marjapõõsaste puhul on mitu olulist probleemi, mida on võimalik multśimisega vähendada ning aja möödudes ka ära lahendada - esiteks igasugused marjapõõsastesse elutsema asunud muud taimed nagu näiteks kassitapp ning naat, samuti hein, mis põõsaste sisemusse kipub kasvama ning ka teod, kellele meeldib põõsastes kolada.
Korralik multśikiht aitab nende olukordade puhul üsnagi edukalt.
Naadi ning kassitapu puhul tuleb endal siiski peale multśimist vähemalt kahel-kolmel aastal ka tavalist kurnamistaktikat kasutada - ehk multśist läbikasvanud taimed lihtsalt nende tekkimisel välja noppida.
Olen märganud, et peale kahe-kolme aastast "trenni" kaovad nad unustusse.
Kuidas multśida, seda saate lugeda vanemast postitusest (5cm nõue juurekaelapiirkonna vabaksjätmisel marjapõõsaste puhul ei kehti):
http://urbandendro.blogspot.com.ee/2015/11/kuidas-teha-oigesti-how-to-do-it-right.html


Multśitud marjapõõsad. Foto: Ravel Reiljan

3. Happesuse kontrollimine:
Kasvupinnase happesuse kontrollimine ning kontrolli all hoidmine on saagikuse ning taimetervise juures samuti oluline aspekt.
Esmalt - kui endal pole võimalik, siis tuleks uurida mõnelt aednikult, kas ta suudaks kasvupinnase happesuse määrata (kasvupinnase pH mõõtmiseks on olemas erinevaid tehnoloogiaid ning seadmeid)
Optimaalseks happesuse vahemikuks kasvupinnases on näiteks karusmarjapõõsastel ca 5,5-6,2pH, mustsõstrapõõsastel ca 6-8pH, punasesõstrapõõsastel ca 5,5-7pH ning valgesõstrapõõsastel ca 6-8pH.
Kuidas kasvupinnase pH-d muuta, sellest kunagi edaspidi.


Teiseks - mida mitte teha?

1. Kärpimine:
Küllaltki tihti aetakse marjapõõsaste puhul segamini kaks erinevat lõikusvõtet - harvendamine ja kärpimine.
Marjapõõsaste puhul tuleks kasutada ainult harvendamist ehk kogu haru eemaldamist.
Kärpimist peaks kasutama vaid erandjuhtudel - kui on tegemist murde, painde või muu kahjustatud osaga, kuid haru ise on terve.


2. Tuha puistamine ja kuhjamine:
Väga levinud stressoriks on tuha laotamine, eriti probleemne on see siis kui tuhka heidetakse põõsa südamikku või jäetakse kuhjakestena põõsa alla.
Puutuhka võite aias kasvupinnase neutraliseerijana kasutada küll, kuid seda tuleks jaotada ühtlaselt ning pigem põõsaste perimeetrit mööda.
Kõige mõistlikum on seda talve jooksul koguda ning kevadiste kaevamistööde ajal kasvupinnasesse kaevata - loomulikult peate enne veenduma, et kasvupinnas juba liiga neutraalne ei ole.


3. Õunte jms väetiseks kasutamine:
Samuti on üsna tavaline ka see, et põõsaste südamikku või harude alla kuhjatakse ülejäänud/raiskuläinud õunu, muid vilju või erinevaid köögijäätmeid (kartulikoored jms).
Soovitan seda siiski tungivalt mitte teha (sellega seostuvad erinevad probleemid), selle asemel ostke või ehitage sobivasse aianurka komposter ning kasutage erinevaid jääke komposteris - juba valminud kompost on teie marjapõõsastele ideaalseks lisandiks (väljapoole multśipiiri).


4. Ülejääva mulla kasutamine:
Lisaks on levinud nipp - aasta jooksul kas ümberistutamise või taimede huku tõttu ülejääv toalillede muld visatakse marjapõõsa alla, lootuses, et küllap see talle kasu teeb.
Paraku ei pruugi see nii aga olla - soovitan sellised ülejäägid samuti komposterisse paigutada.


Lõppkokkuvõtteks võiks öelda, et mõistlikkus taimede eest hoolitsemises ning nende vajadustega arvestamine ja igasugustest äärmustest hoidumine võiks olla eduka koostöö võtmeks.
Proovige eeltoodud põhimõtteid kasvõi osaliselt rakendada ning suure tõenäosusega paraneb ka teie taimede olukord.


Allikas: autori isiklikud kogemused ning tähelepanekud.

Tuesday, August 16, 2016

Millal lõigata viljapuid?

Väga tihti esitatakse mulle järgnev küsimus: millal oleks parim aeg viljapuude hoolduslõikuseks?

Ühest ja selget vastust on tegelikult päris keeruline anda – püüan teemat siiski kergelt lahata ning seda mitte inimeste mugavuse, vaid eelkõige taimede heaolu seisukohalt.

Loomulikult on pea igal aednikul, harrastajal, teenuseosutajal, kasvatajal, tootjal, puukoolil jne asjast tavaliselt oma arusaam ning loogika – seega annan siit juurde veel ühe versiooni (väga lihtsustatult), mis põhineb isiklikel tähelepanekutel ning kogemustel.
Viljapuudega seoses on olemas päris palju ka igasuguseid mööndusi, erireegleid ning kavalaid nippe, kuid käesolevas artiklis püüan anda kõige primitiivsemad juhised just tavakasutajale, kes tahab lõikustööd ise läbi viia.

Et ei tekiks ka asjatut segadust, siis selgitan, et pean Eesti oludes viljapuude all silmas eelkõige vanemast ajast levinud puittaimi - ehk õuna- ja pirnipuid, ploomi,- hapu- ja maguskirsipuid. Teistel puittaimedel võivad olla hoopis teistsugused nõudmised ning sobilikud lõikusajad, kuid neid me hetkel ei puuduta.


Viljapuudele sobivad lõikusajad
  1. Varakevadine lõikus – sooja talve korral (temperatuur nulli piires) veebruari II-st poolest kuni pungade liikumiseni (igal aastal erinev).
    Tavalise, külma veebruari korral oleks sobilik lõikusega alustada siis kui lõikamisaegne temperatuur on nii nulli piires.
    Kevadine lõikuse aeg sobib vaid õuna- ja pirnipuudele, kuid mitte luuviljalistele.
    Kui olete oma viljapuud mõne aasta jooksul heasse korda saanud, siis tuleks kõik lõikused viia suvisele perioodile (heasse korda saanud puu lõikus on kiire ning toimub pea 100% väikeste oksakääridega).
  1. Suvine lõikus – peale lehtede valmimist/vormumist (igal aastal erinev) kuni juuli lõpuni (kaasa arvatud).
    Suvine lõikusaeg sobib eelkõige luuviljalistele ning samuti õuna- ja pirnipuudele.


Mida võib teha kevadise lõikuse ajal?
    Varakevadist lõikust on mõistlik kasutada üldiselt vaid kahel puhul:
    a) eakate/ülekasvanud puude võra järk-järgulise „noorendamise“ ning
    b) eelmisel aastal tekkinud vesivõsude/võrsete (peale noorenduslõikust või tugevamat kärpimist) uuteks oksteks kujundamise puhul.


Mida võib teha suvise lõikuse ajal?
    Suvist lõikust on mõistlik kasutada :
    a) luuviljaliste järkjärguliste noorendamiste
    b) õun- ja luuviljaliste sanitaar(hooldus)lõikuse
    c) õun- ja luuviljaliste harvendamise
    d) õun- ja luuviljaliste vesivõsude rebimise (mitte lõikamise)
    e) õun- ja luuviljaliste viljade harvendamise puhul


Millal ei tohiks kindlasti lõigata?
Kõige ebasobivamad ajad seoses teie taimede tervisega on kevadine aeg pungade puhkemisest kuni lehtede valmimiseni ning sügisene periood lehtede värvumisest mahalangemiseni.
Kui te hoidute oma viljapuid lõikamast nendel aegadel, olete juba oma taimede tervise heaks väga palju ära teinud.


Millal võib ära lõigata rebenenud, murdunud, tugevalt kahjustada saanud oksi?
Astaringselt.


Millal võib ära lõigata kuivanud oksi?
Soovitatavalt suvise lõikuse ajal – siis võite päris kindlad olla selles, milline osa oksast surnud ja milline elus. Või on terve oks surnud.


Kui tihti peaks viljapuude hoolduslõikust teostama?
Igal aastal.


Kuidas lõikeid sooritada?:


Kuidas vesivõsusid rebida?:


Allikas: autori isiklikud märkmed, vaatlused ning tähelepanekud.

Monday, August 1, 2016

Kuidas toimida vastistutatud puude ja põõsaste alustega?

Tihti võib nii ühiskondlikel aladel kui ka eramaadel näha värskelt istutatud puid, kelle tüveümbruses tihe murututt või juurekaelapiirkonnas värsked trimmerdusjäljed – samuti võib kohata erinevaid põõsaid ja hekke, kus põõsas/hekis paiknev muru kipub põõsaga sama kõrgeks või kõrgemakski kasvama.


Võiks öelda, et taimetervise seisukohalt pole see eelnevalt kirjeldatu sugugi mitte hea.


Miks see nii on ning mida teha, et istutatud taimede aluspind annaks neile elu alustamiseks head eeldused?


Multśimata ja heina kasvanud peenra-ala. Foto: Ravel Reiljan


Esmalt – miks ei peaks taimi lihtsalt murualade sisse istutama?

Selleks on mitu lihtsat põhjust – loetlen neist olulisemad:
  1. Niitmiskahjustused – ükskõik kui püüdlikult ka niita ei proovita, olen siiski ilma kahjustusteta värskelt istutatud puittaimi väga harva näinud. Noorele puittaimele piisab vaid ühest trimmerijõhviga vastupuutest, et puu pikalt põdema panna. Kui seda aga mitmeid kordi teha, siis võib taim aastateks kiduma jääda – ta ei ela ega sure, aastakasvud pidurduvad ning halb on kõigil – nii taimel kui omanikul.
  2. Liigintensiivne niiskuse kadu – mida tihedam ning kõrgem muru taime tüvepiirkonda ümbritseb, seda intensiivsem on kasvupinnasest niiskuse väljatõmme. Viimaste aastate kuivad sügised ning kevaded on sellisel puhul aga oluliseks riskifaktoriks.
  3. Lämmatamine või laasumise põhjustamine – kui istutatud taimed on veel õige pisikesed, siis võib juhtuda, et meile vajalik kultuurtaim kipub murutaimede sisse ära peituma, see aga võib põhjustada tema allajäämise või kasvupeetuse. Lisaks olen märganud, et teatud okaspuude sortidel võivad kõrge muru tõttu alumised oksad isegi ära kuivada.
  4. Närilised – kõrge muru tüve ümbruses on talvetingimustes heaks paigaks, kus närilised mõnusalt tegutseda saavad – kevadel võime avastada, et meie hinnaline puu on niivõrd kahjustatud, et teda ei pruugi enam päästa saada.
  5. Dekoratiivsus – kui tegemist on näiteks vastistutatud puittaimega keda toetatakse lisaks 2-3 toestusvaiaga ning kõigi nende ümber on rohupuhmad, siis pole vaatepilt ehk tõesti kõige kenam. Noored hekitaimedki on murutaimedega segatuna vähem dekoratiivsed.


Pea kõik eelmainitud aspektid on taimede jaoks üldjuhul stressoriteks – ning kui meie taim on stressis, siis võime avastada, et peatselt hakkavad teda kimbutama erinevad putukkahjurid või seenhaigused.


Mida siis teha, et taimedel oleks parem ning meil kergem niita ja kenam vaadata?
Selleks oleks mõistlik vastistutatud või ka varasemalt istutatud taimede tüveümbrused või põõsaste alused katta multśikihiga.


Millist kasu multśimine annab:
Üldiselt on multśimine päris kasulik, kuna:
  1. Multś aitab säilitada oma piirkonnas stabiilset niiskustaset, mis on oluline eriti teatud kriisihetkedel.
  2. See aitab vältida erinevate umbrohtude levikut – olen märganud, et esimesel aastal peale multsimist kasvavad umbrohud multśialal 20-30% ulatuses tagasi, kuid neid välja noppides on tulemus juba aasta hiljem pea umbrohuvaba.
  3. Hooldusmugavus – esiteks, te ei vaja enam muruniiduki kõrvale trimmerit ning teiseks on väga mugav puude-põõsaste ümbrus puhtaks niita ilma neid kahjustamata.
  4. Väga oluline on see, et multśikihi abil on võimalik reguleerida varasemalt istutatud puittaimede juurekaela või pookekoha asendit kasvupinnase suhtes – väga tihti on see kasvupinnases, kuid multśimisega saab selle välja tuua.
  5. Ja noh, loomulikult on multśitud ala ka päris dekoratiivne.


Kuidas seda teha?
Kui meil on tegemist alles istutatavate taimedega, siis on see päris lihtne – tuleb jälgida, et multśikiht saaks ühtlane ning üsna paksu kihina (6-10cm), varasemalt istutatud taimede puhul tuleks teha pisut põhjalikumat tööd – oleks tarvis pinnast koorida ning mitmeaastased umbrohud võimalusel välja juurida, alles seejärel on võimalik multśi paigaldama hakata.


Millist materjali kasutada?
Multśiks kasutatavaid ning sobivaid materjale leiame põhimõtteliselt kõikjalt meie ümber ning vaid fantaasianappus võib sellele piirid seada.
Tüüpilised materjalid, mida olen inimesi näinud multśiks kasutatavat, on olnud näiteks männikoor, põhk, turvas, paber, puulehed, killustik, kivid, muruniide, kergkruus, saepuru, puulaastud, munakoored, savipotikillud, käbid, jõekarbid jne, jne.
Oluline on siin see, et teatud tüüpi multśimiseks kasutatavatel materjalidel võib olla ka negatiivsem mõju – näiteks kipub põhk, muruniide ja paber hallitama, lisaks ei teata paberil oleva trükivärvi mõjust taimedele, kergkruus kipub vahel tugevamate vihmade ja tuultega „ära liikuma“, puulehed võivad endas kanda erinevaid seenpatogeene, kivid võivad multśitud ala liiga tihedaks muuta, saepuru võib samuti erinevaid haigustekitajaid sisaldada, mõned materjalid võivad tõsta või langetada kasvupinnase pH taset, mis võib teatud taimedele probleeme tekitada jne.


Kuid põhimõtteliselt võite multśimiseks kasutada peaaegu mida iganes – siiski olen märganud, et suuremate istutusalade või lihtsalt puude ümber tehtavate multśiringide või hekialuste multśimiseks on olnud kõige loogilisemaks valikuks siiski jämedamafraktsiooniline (ca 15-48mm) männikooremultś.


Miks just männikoor?
Männikoore eeliseks on:
  1. Selle suhteliselt aeglane lagunemisvõime – tavaliselt männikoorega multsitud aladele piisab igal aastal vaid ühest juurdelisamisest kogumahuna mitte üle 25% varasemast mahust. Miinuseks võiks lugeda lagunedes kasvupinnasest lämmastiku sidumist, kuid see võib pigem saada probleemiks suurte istutusalade puhul – sellisel juhul on võimalik alati lisalämmastikku anda.
  2. Mitte liiga silmatorkav dekoratiivsus – aias tahetakse üldiselt suunata tähelepanu kas taimedele või tervikule, mitte pinnakattematerjalile.
  3. Suhteliselt lihtne hooldamine – multś on alati peale värsket paigaldamist ilus, kuid mõelge, mis saab sügisel, kui lehed ja muu kraam multśi peale langeb – jämedamalt koorelt on seda suhteliselt mugav rehaga kokku tõmmata, kui ka pisut koort kaasa tuleb, pole sellest probleemi, kuna see on suhteliselt odav ning järgmise hooaaja alguses saate seda vabalt juurde lisada.


Multśitud peenra-ala. Foto: Ravel Reiljan


On veel üks võimalus – kasutada multśivaba multśi ehk kasutada lihtsalt nn „mustkesa“ ehk jätta multśitavale alale läbikobestatud pinnas, kuid selle miinuseks on esiteks umbrohtude teke ehk vajadus rohimiseks ning teiseks kobestamisvajadus, kuna mulla pealispinnale tekkiv koorik soodustab pinnasest vee aurustumist ning seda on tarvis aeg-ajalt kobestada ehk tekkinud kapillaarid pinnase pealmises kihis purustada – seega, suhteliselt töömahukam kui multśimisel abimaterjali kasutamine.


Loomulikult kehtivad tootmisaiandites ning puukoolides omad põhimõtted ja nipid, kuid koduaiapidamises või miks mitte ka avalikel aladel on eelnevalt kirjeldatu kasutamine suhteliselt lihtne ning vähekulukas.


Niisiis, hoidkem oma taimi, siis teenivad nad meid kaua ja hea meelega.


Allikas: autori isiklikud tähelepanekud ning märkmed.